Friday, March 30, 2012

Hot Giardiniera Hummus

Nothing screams Chicago more than hot giardiniera.  It is the ultimate Windy City condiment as I wrote about a few months ago.  I love this stuff.  Hot peppers, celery, olives, carrots and garlic... how can you go wrong?  So you can imagine how much I squealed when I saw a tub of Hot Giardiniera Hummus for sale at my local Whole Food.  Good golly... I knew I had to try and recreate this at home.
While hummus is pretty much available at every grocery store and comes in a variety of flavors... I really encourage you to make your own at home.  It is so easy!  You have few ingredients.  You don't have to worry about additives.  PLUS you can make it exactly to your tastes.  For me and Joe that means SPICY!
I do have one hummus making tip you should try!!  REMOVE THE SHELLS!  Okay, so I know this is tedious but it is so worth it if you want super creamy hummus!  It takes a few extra minutes but the shells pop right off. 
Break out your food processor and get blending.... let me know what you think!!

HOT GIARDINIERA HUMMUS
Adapted from Chef Earl's

Ingredients
  • 1 16-ounce can garbanzo/chick peas
  • 1/2 cup hot giardiniera, packed in oil
  • 3 tablespoons tahini
  • 2 large garlic cloves, minced
  • 4 tablespoons (or more) water
  • Salt & pepper
Directions
  1. Drain and rinse the chick peas then remove the peas from their shells.  This is a bit tedious but worth it!  Simply press the individual peas in between your fingers and the outer shell will pop off.  Discard the shells and place the peas in a food processor.
  2. Add in giardiniera, tahini and garlic cloves along with one tablespoon of water and puree.  Add in additional water until you reach your desired creaminess (for me it was 4 tablespoons.)  Salt & pepper to taste.  Top hummus with additional giardiniera and drizzle with oil from giardiniera jar.  Enjoy!

Wednesday, March 28, 2012

BLT Cups

We are getting our bacon fix today at Wendy See Wendy Do!!  Some days you just need some salty, briny, crispy bacon!  This recipe calls for one of my favorite types of bacon:  PANCETTA!
Pancetta, also know as Italian bacon, is unsmoked pork belly cured in salt and spices (like nutmeg, fennel and pepper) and then aged for months.  It usually comes rolled up which makes it perfect for bacon cups.  
These BLT Cups are the perfect party bite in a pinch.  Seriously... they take 15 minutes to make! 


BLT CUPS

Adapted from Not Martha
Makes 10

Ingredients
  • 10 slices pancetta
  • 1 cup of baby spinach, julienned
  • 1 tablespoon mayo
  • 1 teaspoon lemon juice
  • 5 cherry tomatoes, quartered 
  • salt & pepper
Directions
  1. Preheat oven to 450ºF.
  2. Place a mini muffin pan upside down on a rimmed baking sheet.  Spray ten of the upside down muffin molds with non-stick spray, alternating between molds.  (This will ensure the cups don't stick to each other.)  Gently fold each pancetta slice around the sprayed muffin mold.  Bake for 8-10 minutes, until the pancetta is crisp.  Allow to cool for five minutes until removing to a plate lined with a paper towel.  Set aside.
  3. To make the dressing, combine mayo and lemon juice in a small bowl.  Season with salt and pepper to taste.  In another bowl, toss the julienned spinach with the mayo dressing.  
  4. To assemble, divide the spinach salad into the pancetta cups.  Top each cup with two of the cherry tomato quarters.  Enjoy!

Monday, March 26, 2012

Walnut Plum Puffs

Confucious say: EAT LOTS OF PLUMS!

No really.  Would you believe this tasty stone fruit was listed as one of the most popular Chinese foods back dating back to 479 B.C.?  According the About.com, the plum has been written about and drooled over for centuries with even Confucious himself comparing them to a love interest: 
"The branches of the aspen plum
To and fro they sway
How can I not think of her?
But home is far away."
-Confucious 551-479 B.C.
Food writer Peggy Trowbridge Fillipone says plums are the second most cultivated fruit on the planet, second only to apples.  That is A LOT of plums!
This tart harnesses the power of the plum:  brown sugar balancing the natural tartness, walnuts complimenting the earthiness, and puff pastry creating the perfect buttery package to wrap it all up.  I think Confucious would approve!!


WALNUT PLUM PUFFS
Adapted from Grace Parisi
Makes 6 

Ingredients
  • 3 ripe plums, pitted and thinly sliced
  • 1/2 cup chopped walnuts, lightly toasted
  • 1/2 cup packed light brown sugar
  • 1 1/2 teaspoons corn starch
  • 1 sheet of store-bought puff pastry, defrosted
  • 1 large egg, lightly beaten
  • 1/4 cup or more granulated sugar for topping
Directions
  1. Preheat oven to 375ºF.
  2. In a mixing bowl, combine plums, brown sugar, and corn starch to make filling.  Set aside.
  3. On a lightly floured surface unfold puff pastry.  With a sharp knife cut dough into six sections.  Working with one section at a time, roll out the puff pastry to about a 4X4 inch square.  Spoon 1/6th of the filling onto the center of the dough square and top with about one tablespoon of walnuts.  Bring together the four corners of the dough and, using your fingers, pinch together the sides making sure to leave the top open to vent steam. Carefully place on a sheet pan lined with parchment paper (OR foil that has been sprayed with non-stick spray.) Repeat with remaining dough sections.
  4. Brush all the puffs with the beaten egg and the sprinkle with lots of granulated sugar.  
  5. Bake for about 30 minutes or until pastry is golden brown.  Allow to cool in the pan for about five minutes.  Enjoy!

Friday, March 23, 2012

In Memory of Marge

Last week the world lost an amazing woman: my future mother-in-law, Marge.  Her death was sudden. She had only been diagnosed with cancer three weeks before her passing.  At the young age of 67, she left behind a 45-year marriage to the love of her life, three successful children, three gorgeous grandchildren, and a beautiful garden.   As we all grieved and said our heartbreaking goodbyes something extraordinary was happening around us.  In the middle of March, in Michigan, Marge's flowers began to bloom.  The unseasonably warm weather spreading across the northeast had coaxed the blooms from their buds leaving splashes of yellow and purple and green.  Marge's garden was springing into life.
I will miss Marge's smile.  I will miss her passion for cooking.  I will miss hearing her quietly singing and humming around the house.  I will miss Marge's creativity.  I will miss her stories about Joe growing up.  I will miss Marge's hugs and kisses.  I will miss all of those mother-in-law/daughter-in-law moments.  I will miss many things about the woman who gave birth to the love of my life.  I am forever thankful I had the chance to meet her, love her and be loved by her.  Anytime I see a beautiful flower I will think of Marge and her garden.
Wendy See Wendy Do will be back next week with more recipes and fun stories but this weekend I ask you all to hug those you love.  If you can't, call them on the phone and tell them how much they mean to you!!

Monday, March 12, 2012

Cinnamon Sugar Pull Apart Muffins

Ahhhh, cinnamon sugar!!  The perfect combination of spicy sweet.  Doesn't it just scream childhood memories?  I am pretty sure everyone was treated with a cinnamon sugar something when they were a kid.  For me, it was cinnamon sugar toast.  My mom used to slather lightly toasted bread with lots of salty butter and then top it with a heaping amount of cinnamon sugar.  The spice mixture just perked me up and made me smile!  It still does today!!
Don't be intimated by this recipe.  It is quick, easy and super delicious.  What is my secret weapon, you ask?  Store-bought bread dough!  Have you ever used this stuff?  I love it!!  Use it to make a loaf of tasty french bread, roll it out to make a thick pizza crust OR pull apart muffins!!  YEAH BABY!!


CINNAMON SUGAR PULL APART MUFFINS
Makes 6 muffins

Ingredients
  • Pillsbury Simply Rustic French Bread dough
  • 1/2 stick of butter
  • 1 cup sugar
  • 2 teaspoons cinnamon
  • 1/2 teaspoon nutmeg
Directions
  1. Preheat oven to 350ºF.
  2. In a small skillet, brown butter over medium-low heat, about 5 minutes.  You know the butter is browned when it turns a light caramel color and smells slightly nutty.  ((Be careful not to burn the butter!))  Once browned, set the butter aside to cool.
  3. Remove bread dough from tube and place on a cutting board.  Starting in the middle, divide the dough with a small slit.  The divide again and again until you have 31 slits.  Using a very sharp knife, slice the dough.  You should end up with 32 slices.  Flatten each slice with you hands or a rolling pin and place on a sheet of parchment or wax paper. 
  4. In a bowl, combine the sugar, cinnamon, and nutmeg.
  5. To assemble the muffins, brush each dough slice with the brown butter.  Then sprinkle with the entire sugar mixture.  (Yes, ALL of the cinnamon sugar!)  Stack the dough slice on top of each other. (some stacks will have five slices and some will have six.)  Using a sharp knife, slice the stacks down the middle.
  6. Place two of the sliced stacks, side by side, cut side down into a greased muffin tin.  Repeat with the rest of the stacks.
  7. **This step is very important!!**  Before you put the muffin tin in the oven place it on a larger, rimmed baking sheet.  This will catch any butter/sugar overflow and avoid a very smokey oven.
  8. Bake muffins for 20-25 minutes until tops are golden brown.  Allow to cool for 10 minutes.  Gently remove.  Enjoy!!

Tuesday, March 6, 2012

Buffalo-Style Deviled Eggs

Here is the scenario:  you were invited to a picnic or party months ago and the day of you remember you were supposed to bring an appetizer.  Crap!  You have two choices: take a shower or go to the store to pick up something.  Shower wins (I am sure the party guests will appreciate it!) and you raid your fridge.  
I don't know about you but there are a few items that always gather in my fridge and pantry.  Mayo and eggs because they are essential.  Hot sauce because my fiance is a hot sauce hoarder.  Crumbled blue cheese because you never use the whole tub.  AND lastly, celery seed because I bought it for a dish that only called for 1/8th teaspoon leaving me almost an entire bottle.  Combine all those and you have Buffalo-style Deviled Eggs!!  Is that not the perfect party or picnic appetizer?  
Now while this scenario has never happened to me personally... yet... I now have my go-to deviled egg dish just in case!!


BUFFALO-STYLE DEVILED EGGS

Ingredients
  • 6 hard boiled eggs
  • 4 tablespoons mayonnaise
  • 2 teaspoons hot sauce (I used Frank's)
  • 2 tablespoons crumbled blue cheese
  • About a teaspoon and half of celery seed
  • Salt & pepper
Directions 

Cut eggs in half, place egg yolks in a mixing bowl and set egg whites aside.  Using a fork, mash the yolks.  Stir in mayonnaise and hot sauce.  Fold in blue cheese.  Salt and pepper to taste.  Spoon yolk mixture back into egg whites or pipe yolk mixture in using a pastry bag.  Top with a sprinkling of celery seed.  Enjoy!!

Friday, March 2, 2012

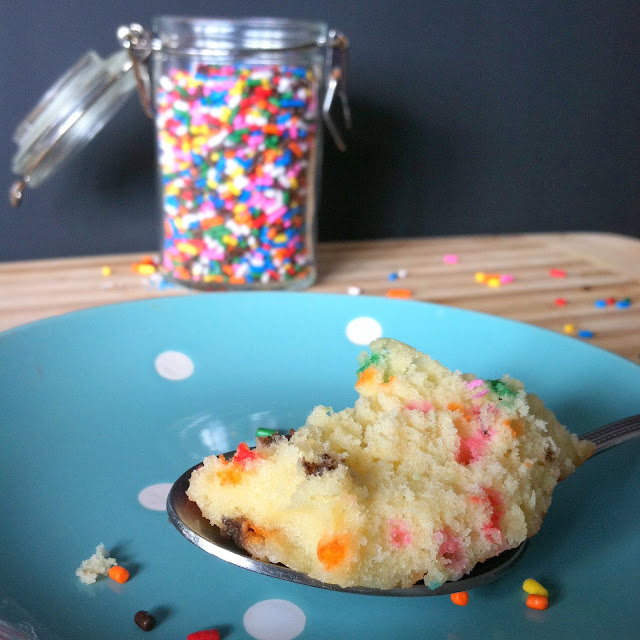
Funfetti Mug Cake

It's Funfetti Friday!! Do you have any big plans this weekend? I have something for your to-do list: this funfetti mug cake. I don't know about you but when the weather is cold and drab, as it usually is in March, I enjoy a weekend night in. There is something about cuddling up on the couch after a good meal, watching a movie and enjoying a nice, hot mug of.... cake? Yes, cake!!!
This is a fun change to your typical chocolate mug cake. The batter is not too sweet and the rainbow sprinkles add lots of fun color and texture! So grab your favorite large mug and get your cake on!!!


FUNFETTI MUG CAKE
Adapted from DELILLE/Spark People
Makes enough for 2 servings (if you want to share)

Ingredients
  • 4 tablespoons all-purpose flour
  • 3 tablespoons of sugar
  • 1/2 teaspoon baking powder
  • 4 tablespoons milk
  • 1 1/2 tablespoon oil
  • a dash or two of vanilla extract
  • 1 teaspoons of rainbow colored sprinkles
  • A pinch of salt
Directions
  1. In a large mug, mix together all dry ingredients. Add milk, oil and vanilla extract. Then stir in rainbow sprinkles and salt.
  2. Bake in microwave for 2 minutes. If the cake is not completely done then continue cooking in 15 seconds intervals until it is cooked through. Eat straight out the mug. Enjoy!

Thursday, March 1, 2012

Oven-Fried Salt & Vinegar Potato Chips

If I had to name my favorite snack in the whole entire world it would be salt & vinegar potato chips!  Crispy potatoes, tangy vinegar and salty... well salt!  LOTS of SALT!  
I have dabbled in home-made chips over the years but have never tackled these salt & vinegar lovelies til now and not to toot my own horn... but TOOT TOOT... this guys are good.  The white vinegar is just the right amount to give each chip some tang without overpowering your taste buds.  Make them for a crowd... or just for you!!


OVEN-FRIED SALT & VINEGAR POTATO CHIPS


Ingredients
  • 3 large russet potatoes, sliced 1/32 inch thick using a mandolin
  • 2 1/2 cups white vinegar
  • non-stick cooking spray
  • kosher salt
  • cracked black pepper
Directions
  1. Place potato slices into a pot and over with white vinegar.  Bring to a boil then reduce heat to medium and cook for 5 minutes.  Cover and remove from heat and allow to sit for 30 minutes.
  2. Meanwhile, preheat oven to 450ºF.  Grease 2 baking sheets with non-stick cooking spray.
  3. Drain potato slices and pat dry with paper towels.  Arrange half of the potato slices on the baking sheets.  Spray again with non-stick cooking spray and sprinkle each slices with a kosher salt.  Bake for 8 to 10 minutes until chips are golden and crisp.  Allow chips to cool on a paper towel.  Repeat with second half of potato slices.  Enjoy!!